Import Sales (Invoices)
Importing Sales in XPOS
The Import Sale feature allows you to add multiple sales records at once using an Excel file, saving time and manual effort.
1. Steps to Import Sales
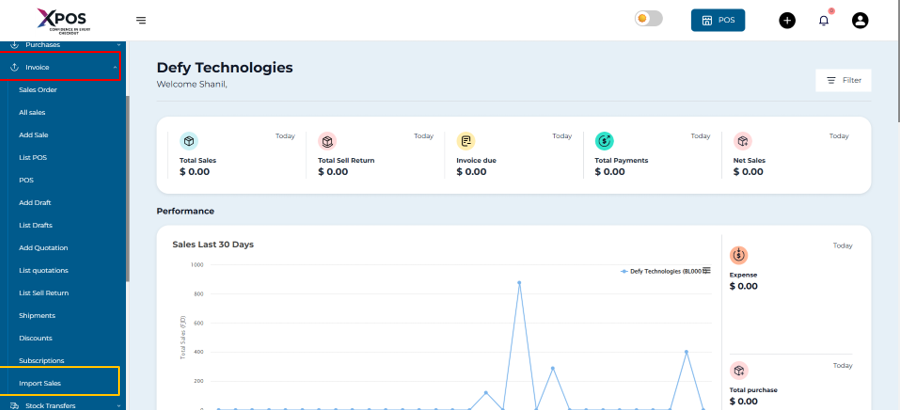
Step 1: Open Import Sale Page
- Go to Sales → Import Sale.

Step 2: Download the Template
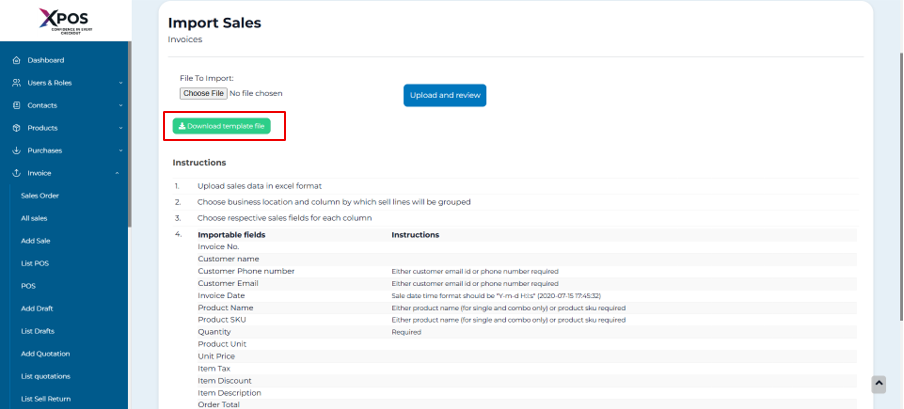
- Click Download Template.

- This file contains the required columns and instructions.
- Do not rename or remove any column headings.
Step 3: Fill in Sale Details
- Open the downloaded Excel file.
- Enter all sale data as per the instructions shown on the Import Sale page.
- Ensure values such as dates, product names, quantities, and prices follow the specified format.
Step 4: Upload the File
- Save the completed Excel file.
- Click Choose File and select the file.
- Click Submit to import the sales.
2. Handling Import Errors
- If the system shows errors after uploading, it means some data does not follow the required format.
- Review the error message.
- Correct the data in the Excel file.
- Upload the file again.
3. Understanding “Group Sell Line By” Field
The Group Sell Line By option tells the system which rows belong to the same sale.
How It Works:
- You must select a column that uniquely identifies a sale.
- All rows with the same value in that column will be grouped into one invoice.
Example:
-
If your Excel file contains an Invoice_Number column:
- All products from the same invoice should have the same Invoice_Number.
- Select Invoice_Number in the Group Sell Line By dropdown.
This ensures the system creates one sale per invoice number instead of multiple separate sales.
4. “You Cannot Select a Field Twice” Error
Cause:
This error occurs when the same column name is mapped more than once during the import process.
Solution:
- Review the column mapping table.
- Make sure each field is selected only once.
- Remove duplicate selections.
- Proceed with the import again.