Configuring keyboard shortcuts for POS screen
1. How to Add or Change Shortcuts
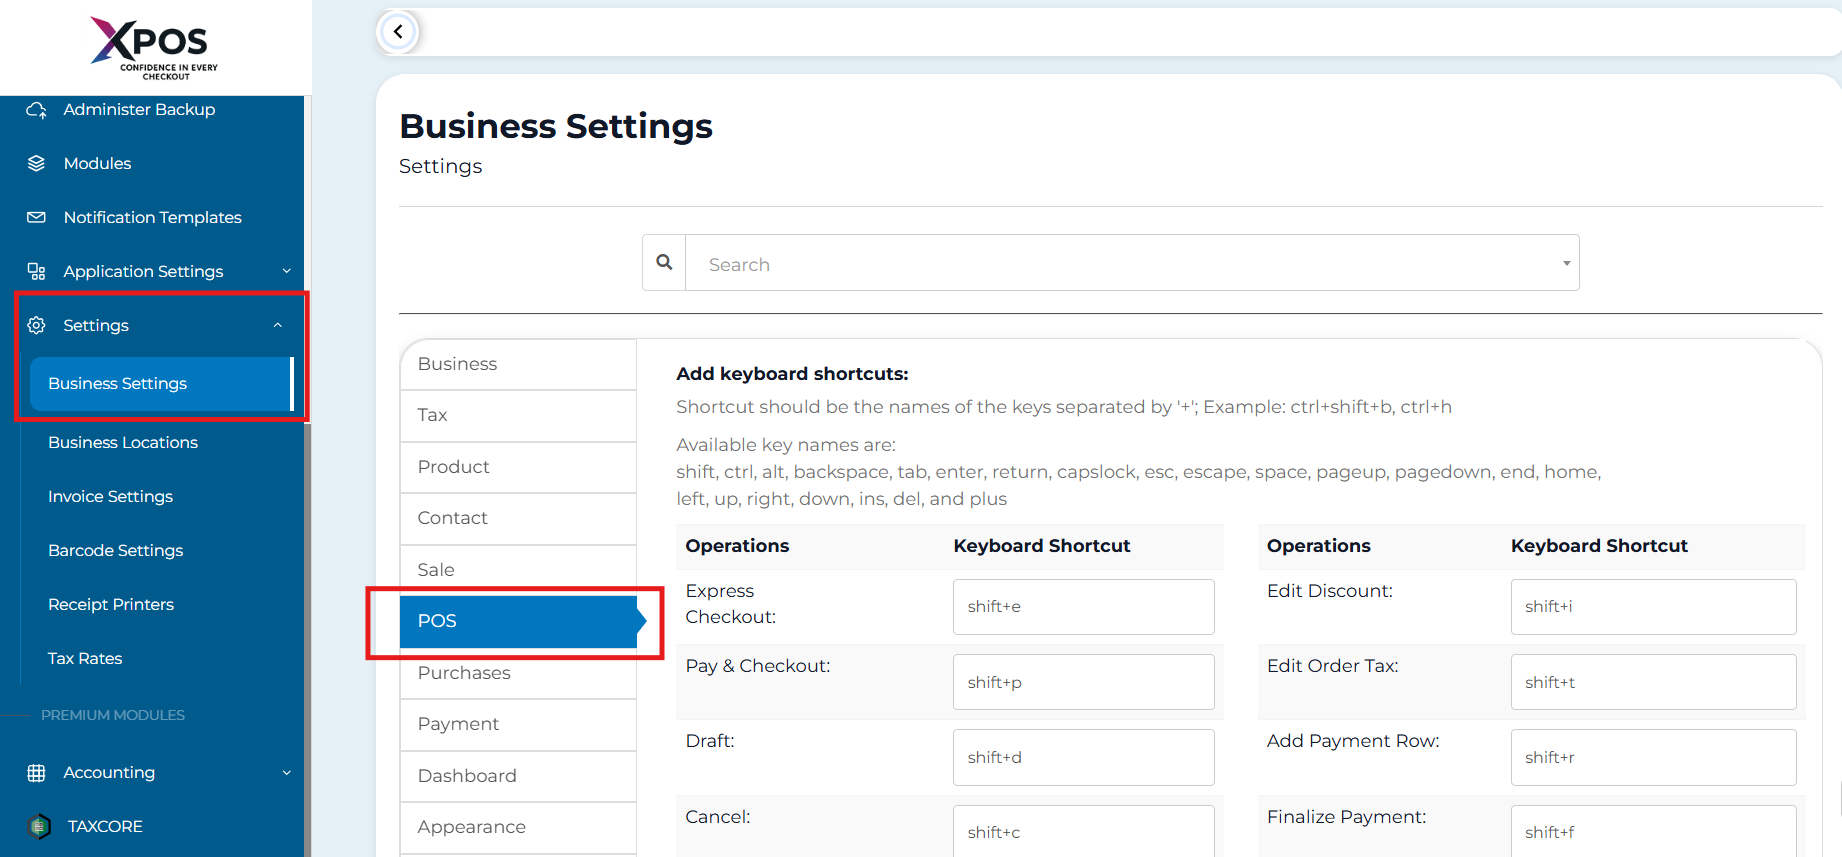
- Open XPOS and go to Settings → System Settings → POS Section.

- Find the Operations list with the current shortcuts.
- Click the shortcut field of the operation you want to change.
- Press your desired key combination using the Available Key Names (see below).
- Click Update Settings to save the shortcuts
Important: Do not use shortcuts that conflict with your browser (e.g., Ctrl+T opens a new tab).
2. Available Key Names
- Modifier keys: shift, ctrl, alt
- Navigation keys: backspace, tab, enter, return, esc, escape, space, pageup, pagedown, end, home, left, up, right, down, ins, del
- Other: plus
3. Default XPOS Shortcuts
| Operation | Keyboard Shortcut |
|---|---|
| Express Checkout | shift+e |
| Pay & Checkout | shift+p |
| Draft | shift+d |
| Cancel | shift+c |
| Go to Product Quantity | f2 |
| Edit Discount | shift+i |
| Edit Order Tax | shift+t |
| Add Payment Row | shift+r |
| Finalize Payment | shift+f |
| Add New Product | f4 |
4. Tips for Safe Shortcut Configuration
- Test new shortcuts immediately on the POS screen.
- Keep a reference of your customized shortcuts handy.
- Use modifier keys (ctrl, shift, alt) to avoid accidental conflicts.